Darkmoor Strategy Guide

Hello Wizards, Amber Ravynsong here with the Darkmoor Strategy guide you all have been asking for. Darkmoor consists of three dungeons. First, Castle Darkmoor, then The Upper Halls, and finally The Graveyard. 3495 Crowns will purchase this area permanently, and 495 can get it for 6 hours. Start to finish, all 3 dungeons could be done in just under 2 hours if the strategy goes as planned. You are likely to spend a lot of time here farming for gear and helping friends do the same. Even more so if this is your first Exalted Wizard.


There are some new spells in the Spiral, and I run my strategy a little differently than some of the guides you may have read before. So, I will take you carefully through each boss and all 3 parts of the Area. If you follow this guide, you will have a much easier, quicker time getting through the dungeons, and getting those must-have Malistaire drops will be a whole lot more fun. So, let’s do this!

PART ONE, CASTLE DARKMOOR

Howling Chaney

The first boss we encounter in Castle Darkmoor is Howling Chaney. If you or your pet heals at all while in this battle, Chaney will hit you with Gnomes. That is Chaney’s only cheat, so stacking up some Feints and blades is the way to go. My preferred strategy is to stack a few Feints on the boss, then hit with something like Storm Lord, but blades are just fine here too. Chaney is easy, but don’t get used to it, there are bigger challenges to come.

SIR BLACKWATER

Next, we come to Sir Blackwater. Sir Blackwater will remove any single blades that you cast on yourself. “I Disarm you Wizard”If you are not life or fire you could self-cast spirit or elemental blades as he will only remove the last of the 3. If someone on the team is over-level, Aegis can be used for self-blading to thwart the cheat.

Even though Blackwater presents himself as Star school he has as much storm resist as any true Storm boss, so you will have to pack converts if you are Storm. Blackwater will Dark Pact to remove any weakness or universal traps such as Feint at the end of your casting round. Therefore, the only way to Feint this boss is to Feint the same round the attacker hits.

When we get to round 5, things start getting nasty with the boss casting pierce rings followed by Shadow school attacks within the same round. The ideal strategy here is to stack up as many blades on your attacker as possible in rounds 1-3. Have each team-mate besides the attacker cast a different Feint on the boss in round four while the attacker hits. If you follow that plan of attack, you should be done with Blackwater in short order.

After taking down Sir Blackwater, as you run up the stairs you will see a key door. Inside the room is a treasure chest only. The best drop you can get is a mastery amulet which also provides accuracy, a little damage, and a very useful Shadow Shield. If you were lucky enough to win a Gold Key in the last battle, use it here for sure.

The Howling Werewolf’s Collar is only one example of the Mastery Amulets that may drop here.

Continuing up the stairs, you will find yourself in the final area of Castle Darkmoor. There is a boss here you can fight if you fail the puzzle but this is not often done, as his drops aren’t worth mentioning and we still have many battles ahead. Run up to the crimson box and press X then up onto the platform pull down the center lever. You will see a spotlight on a far door which is the exit from part one, Castle Darkmoor.


PART TWO, THE UPPER HALLS


When you first enter the Upper Halls you will find a mob of Darkmoor Gargoyles at the end of a long hallway. It is not necessary for any reason to face this mob unless you are a completionist. They do not drop any important items and cannot be harvested for Animus at this time.

The first Wizard to approach them will be pulled into battle, but the rest of the team should simply run around this mob. Once the team has safely passed the first Wizard should flee and use dungeon recall. When approaching the mob the second time, the “pull” will not trigger and the first Wizard can run around the mob by heading straight for either side door.

This brings us to the first boss of the Upper Halls.

Akhtang

Akhtang is a Fire boss who likes to use Steal Charm to take your blades. So, no self-blades unless you have Aegis to enchant them. When any blade is cast Akhtang will “Rip it from you” This includes Elemental Blades, he will take the third blade from whoever received it. The only way around this is Aegis. This fight can be sometimes hilarious when the minions Insane Bolt and kill themselves, but that same attack can also hit you. Which is decidedly less hilarious.

This boss is quick and easy with the right plan. I suggest the Four Round Feint Kill strategy. Each round, a supporter casts a different Feint. The attacker will hit on round four. Blades are optional but appreciated. Shatter should be held in standby as a treasure card, just in case the boss decides to use a Storm Shield. We will use this same strategy next, and again in the Graveyard.

After defeating Akhtang you will be facing a Draconian mob. Unlike the Gargoyles before, these minions are worth fighting if you are collecting Animus. There is no cheat worth mentioning. They should be quick and easy to kill. However, you can also choose to simply run around them and continue to the next boss if you are in a hurry to get your new Spell.

Spirit of Darkmoor

The Spirit of Darkmoor is a Life/Fire/Myth boss and she resists those 3 schools. If you blade at all she will cast a Mass Scald. This attack can really add up to disaster for at-level defenses with all her pierce. So, I suggest no blades at all, to keep things simple and keep everyone alive. If you trap, she will hit you with an extremely powerful Myth wand attack. The only traps that do not trigger this cheat are mass traps such as Windstorm and Mass Feint.

This boss has lots of other nightmares in store for us if we let her live to cheat on round five. We don’t need to worry too much about that though, because we will use the Four Round Feint Kill strategy. Depending on your specific team, either divide up Feinting duties or try to heal and shield the Wizard with the Feints each round. We won’t talk about what happens on round five. If the worst happens, and you end up making it to round five, just flee and try again. For real. That rarely happens though, by round 4 we should be done and on to the next fight.

Shane Von Shane

Assuming you didn’t fight him instead of solving the puzzle this will be the first time you fight Shane Von Shane. You will face him again in the Graveyard, so remember the strategy and cheats we use here. If you or your pet heals, he will hit you with a very piercy 1k Vampire. That means, healing pets off. A healer can deliberately cast heals while facing Shane by first casting a death shield if the team needs that. This boss must be “spammed.” This means he must be hit every round by one teammate or he will start a series of cheats which end in your sure demise. The good news is, over time spells such as Scald, Deer Knight, Poison, and Elf do count as spam here for as long as the overtime tic is active. Our feint strategy won’t work here because any universal traps will be removed, even with Indemnity. The good news is, we can use other blades, traps, and shields freely with this version of Shane. It should be a pretty quick kill after a few rounds of blade stacking. Shane is the final boss of the Upper Halls, so after he dies if it’s your first time through you will be getting your spell on the other side of the porting lens.

PART THREE, THE GRAVEYARD

Welcome to the final part of Darkmoor, the Graveyard. This is the part of Darkmoor that you are likely to spend the most time in since the must-have Malistaire gear drops here.

YEVGENNY

The first boss inside the Graveyard gates is the zombie gatekeeper Yevgeny. Anytime a blade is cast this boss will stun the caster. On round five, Yevgeny will hit the Wizard with the lowest heath with a powerful Weaver. This often kills the receiving Wizard. The good news is, we can Feint. Again, we will employ the sure-fire Four Round Feint Kill strategy. If for some reason we get to round five, we will need to Shatter ahead of the hit. This boss is usually pretty fast, and the quicker the kill the better the drops. Be sure to check to see if you got one of the Graveyards prized drops, a no auction, school-specific damage athame.

SHANE VON SHANE

Yep, he’s back again, and this time with a mechanical robot body. This version of Shane has all the same rules as before with a few more. He is back this time as a Storm boss, instead of Death. If your attacker is Storm, convert is a must. Again, you will need a spammer and again you will want a Death shield before any deliberate heals. It is important to note, if you choose to blade, Shane gets a free Supercharge. In other words, if you choose to blade when his pips are high you are giving him free huge blades that could kill you. The best plan of attack here is to stack traps on the boss after converting. Then, add some blades when his pips are low, and Shane Von Shane won’t be a problem very long.

MALISTAIRE THE UNDYING

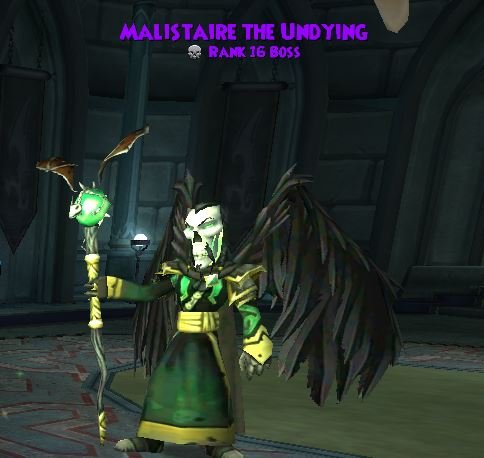
Malistaire is the final boss of the Graveyard and he holds the prized gear drops that everyone is after. The minions that spawn each time you face him are random schools. Malistaire will steal any universal blade or shield that is cast and he will remove any universal traps.

There are some exceptions to this rule that are important to note. If you are Balance and cast Bladestorm, he will only take your blade, not everyone’s blade. If someone on the team is over level 100 and has trained Indemnity, a universal trap such as Feint can be cast on this boss. If you are able to protect your blades with Aegis, they will withstand one cheat. Mass Feint will not be removed by Malistaire, and can stack with other traps.
 
After every fourth round, there will be an Earthquake. My preferred sure-fire strategy for a Wizard with at level gear and stats is as follows. Trap the boss for the first four rounds. Fifth and sixth round stack up some blades, and then hit on round seven or eight. Yes, counting rounds is necessary here.

They call him The Undying because when Malistaire dies the first time, he returns with even more health. It is the ideal strategy to cast Doom and Gloom on the kill round to counter-act this cheat, so be prepared with it in your treasure card deck unless you are the attacker. Ideally, after the boss dies someone lifts the Doom as soon as possible with Sanctuary or even just a school ring such as Darkwind. When Malistaire returns in shadow form, his dragon rebels against him and casts a 100% Feint. This makes killing him the second time that much easier. Use the same strategy as before to send him to the after-life for good this time, and good luck on drops.

3 thoughts on “Darkmoor Strategy Guide

  1. That is such an awesome spelt out review of darkmoor, thank you so much.
    Any chance of an up date on this since the “serving” of the game.? Or are there no changes?
    Thanks Kim. (Kayla Death wiz)

    1. This guide works just as well today as the day it was published. I have updated a few things as updates came to the Spiral.

Comments are closed.